You know, when I signed up for this bee and got January 2011, I thought my month would never come! But it's here~
This month I'd like you to help me keep
my new year's resolution-- Finish some UFOs.
The first I'd like to cross of my list (and the easiest to package up and send out to you) is this radiating square type block, made with Courthouse Steps construction. Here is my inspiration quilt from the 2009 Empire Quilt Show in NYC:
Cozy Squares by Véronique Milliez.
I started making a bunch of blocks with black centers and scraps from my strips drawer. The construction is pretty easy, but I made a short photo tutorial anyway.
Things to keep in mind:
- Blocks will have radiating squares of various widths. Please keep the 4 sides the same width! I'm not asking for perfection, but I do not want wonky! Try to keep your rings 2" finished or less.
- This quilt is really random & scrappy, the fabrics in your envelope may not look good together to your eye, but all I want is contrast between each ring of color. All together (like the inspiration quilt), they'll look awesome. Feel free to add your own fabric if you want.
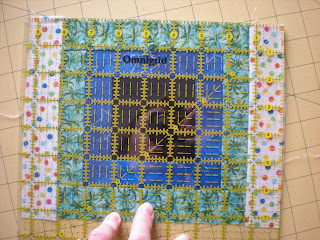
- Because we're working with scrap strips and no strict "pattern", construction should be pretty easy. You do need to square up the block after each fabric addition in order for it to lay flat though (see pics below). Stop once your block gets to be about 13.5" unfinished. I'll do the final square up at home, thanks!
- Send your block and all left over fabric back to me by January 31st~
Ok, on to the tutorial.
We start with a black center square:
Add the first color to two sides:
Straighten your edges (should be 3.5" x ? at this point.)
Add the next two pieces to make a square, square it up again:
Your first ring will look like this:
Choose a contrasting fabric, trim it to equal widths, and add more rings. You will end up with some small scraps, please send them back to me for my next
spiderweb quilt.
Straighten your edges before each addition:
The rings should be added in the same order, so your seams look like this:
And Voila! A finished block:
Here's my fabric all sorted and ready to go:
I'm sending you one black center square and 6-7 strips of fabric. You don't need to use all of them, but send back anything left over so I can make more scrappy blocks. I've got pics of my finished blocks
in a set on flickr. You can see how colorful and scrappy it's going to be. Thank you all so much for your help this month!
p.s. if I owe you a block (Sarah, Tanya, & Molly) it will be included with your fabric.


